
Setting up and playing with green screens is one of those impressive tech activities that looks amazing and is surprisingly easy to do! 💚
Whether you want to place your students in front of any weather situation during an Earth Sciences unit, in any place around the world for a geography study or record them in space, the options are as endless as your (and your students’) imagination! Did we mention that it is super easy to do?
Read all for all you need to know!

You only need 2 things in your Green Screen set up… the actual ‘Green Screen’ and an iPad (or iPhone) that has iMovie installed. The great thing about setting up a green screen is that it can be anything green! You certainly don’t have to buy a purpose-built green screen. Some options I have used in the past are:
💛 Green cardboard or paper stuck together (I have created a HUGE wall using A4 sheets of green paper in the past 😆)
💛 Cardboard painted green (Why not paint the inside of a pizza box green for a cute mini green screen?)
💛 Cheap green fabric from Spotlight (the cheapest you can find! 🙌🏻)
💛 Green plastic tablecloths from the $2 store
The only thing to consider when sourcing your Green Screen material is that shadows (caused by creases and wrinkles) can sometimes show up when filming – although iMovie allows you to play with some settings in post-production that can often eliminate this issue anyway.
The size of the screen needed depends on what you are wanting to film. Fabric or tablecloths are great for capturing students, whereas cardboard and paper are better for smaller-scale projects such as filming a puppet or Lego retell in front of a storybook scene. If you were planning on setting up a green screen along with our News Station Play Pack, then you would need to source a large piece of fabric, or a few tablecloths hung together.
As for the Green Screen app? iMovie – which is a free download – is all you need! If you can’t see the features I refer to in the blog, just make sure your version of iMovie is updated.

Choose your background: Before you start, you will need to source the image or movie clip of whatever you want to place your students (or other subjects) in front of. Please note that this needs to be in widescreen format (16:9). If you are planning on using a green screen as part of our News Station Play Pack, we have a range of News Story backgrounds as well as some weather report images available in our Green Screen Pack. Have this image or video saved in your camera roll.
Film a clip: Record a video clip of your students (or whatever the subject might be) in front of the set-up green screen. This will be automatically saved to your camera roll.
This video tutorial will step you through the easy process of putting it all together in iMovie – or scroll on for step-by-step written instructions.
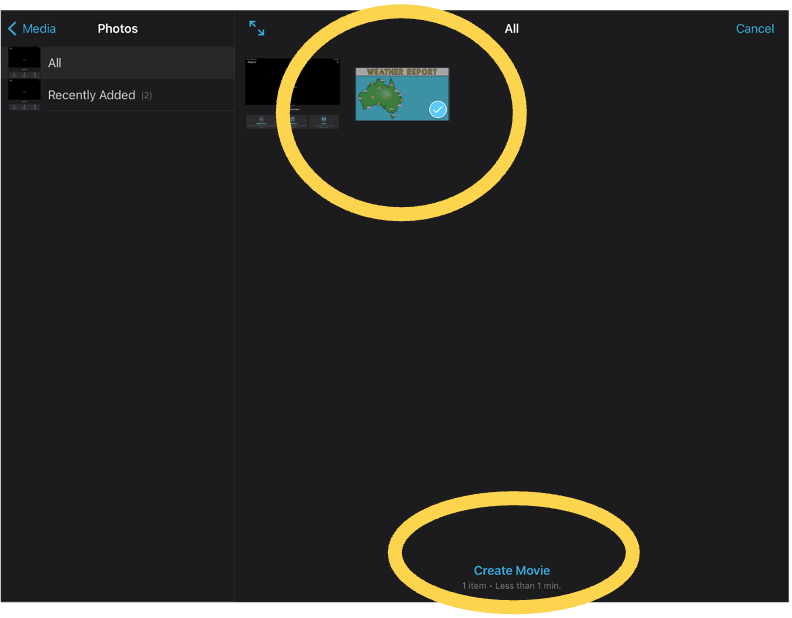
Open iMovie and choose New Project, then Movie.

Choose your preferred background image and click Create Movie.
Select the background image so a yellow square appears around the outside. Disable the ‘Ken Burns effect’ by tapping ‘KEN BURNS ENABLED’. Then use a pinching motion on the large image to make sure the whole picture is visible.
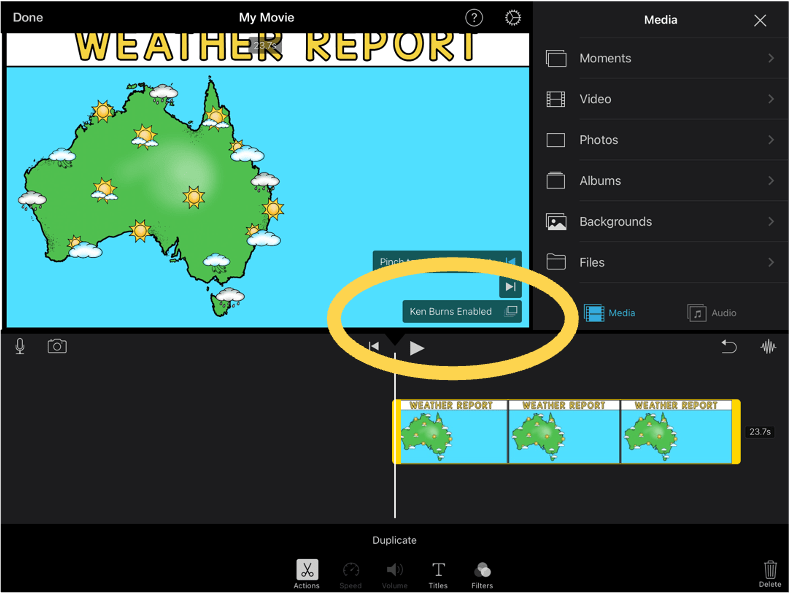
Increase the duration of the image by holding your finger on the thick yellow line to the right of the image and dragging it out.
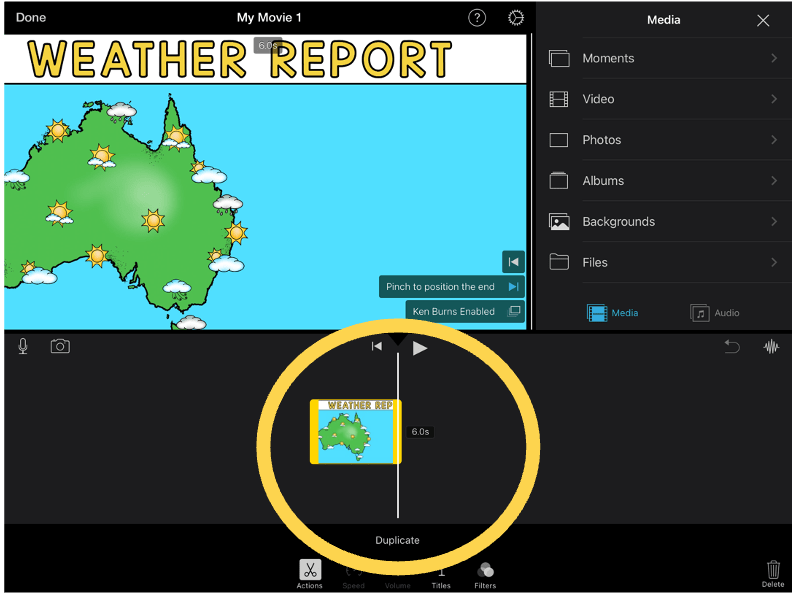
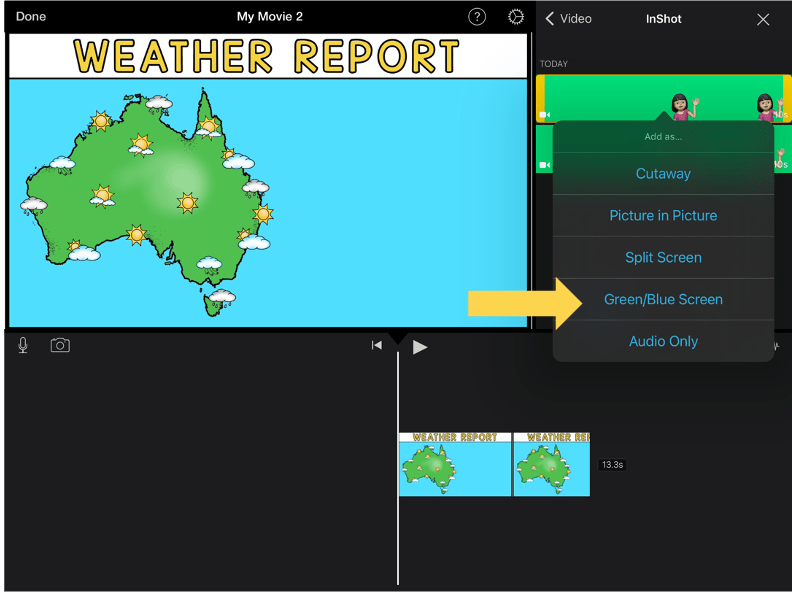
Now it’s time to add your green screen movie clip. Make sure the background image is selected (so that it has a yellow box around it) and click the plus button in the top right corner.
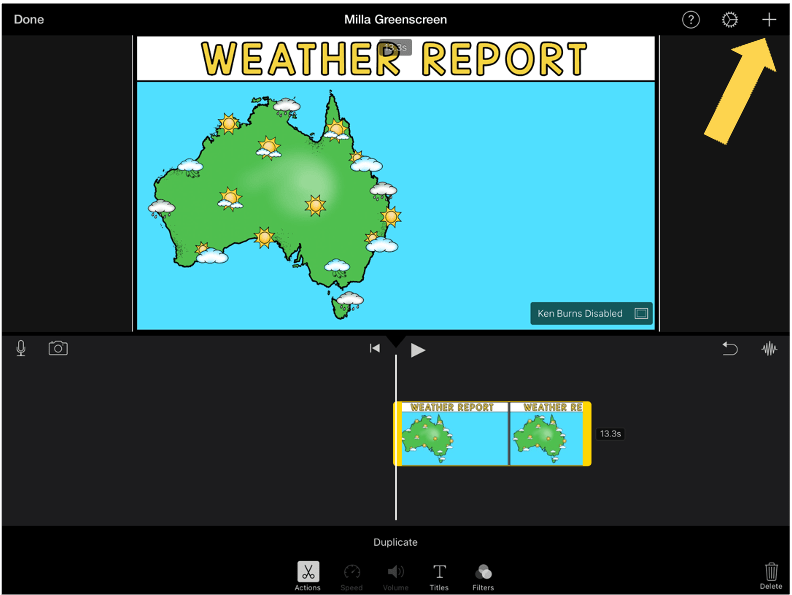
Locate the clip and tap it. Choose the ‘…’ and select Green/Blue Screen.
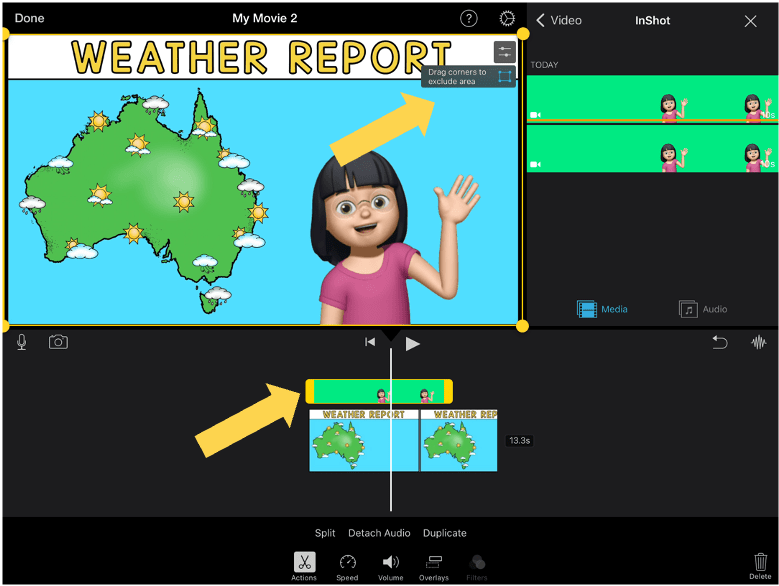
Your clip will drop onto your background image, with anything green in the green screen video clip becoming transparent. Please note if the student has anything else green on them, such as clothes or objects, it will also become transparent!

When the green screen layer is selected (yellow box around green screen video), you can make edits such as cropping out parts of the clip or adjusting the sensitivity of the green screen (super handy if there are shadows or visible areas).
To save to camera roll, tap done in the top right corner, and then tap share (rectangle with an arrow) in the bottom middle and choose save video.
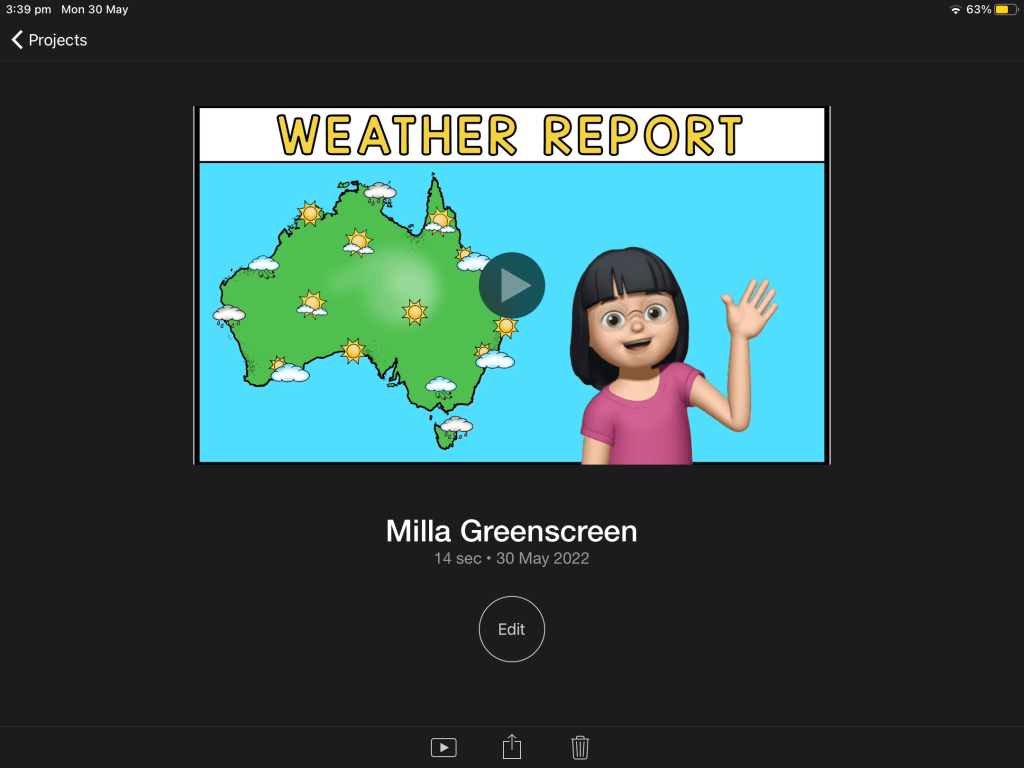
And that is it! It really is so simple to create super impressive video clips. If you would like a printable version of these instructions, please see our Green Screen News Station Pack.
Android users don’t have to miss out on the fun either – apps like DO-INK Green Screen (approx $5) will produce the same effect.
We would love you to tag us in any green screen fun that you create in the classroom!
